|
|
Sök på 24volt.eu
|
|
Besökare/Visitors
online: 1
|
|
Solar Air Heater 1
|
In total we have now constructed almost thirty solar air heaters during the evening classes we have had here in
Vilhelmina. I have participated myself in all of these classes, and have had the privilege to share and learn
from all of the participants many ideas. The solar air heaters themselves also improved as time passed and the
latest model, seen in the picture below, is really quite good-looking, in my opinion! A further wish would
perhaps be for the black sheet metal strips to fully cover the sides of the solar air heater.

|
If you want to build your own solar air heater it is a good idea to spend some extra time thinking about the
measurements of the solar heater, in order to keep costs and wastage as low as possible.
The solar air heater in the picture measures 213x123 cm, which gives a surface area of 2.5 square metres and a
power of about 1 kW. An equivalent solar heater retails for about 7-800 kr; this one can be built for around
2000 kr and that includes solar panels (6 watt), a fan and a thermostat.
Since we have used polycarbonate sheets instead of glass, the width of the polycarbonate sheets has determined
the height of the solar heater. The polycarbonate sheet we chose has a thickness of 4 mm, a width of 210 cm and
it is sold by the metre. Using a 6 mm thick polycarbonate sheet would probably provide increased stability, but
even then it will probably still sway when its windy, so a crosswise, internal strip of metal may also be
necessary here. The wooden frame was made three cm wider (1.5 cm on each side) so that the polycarbonate sheet
could be lowered into the frame. For the back we chose plywood (12 mm) with a width of 120 cm and since the
plywood board also was lowered into the frame the final width of the solar heater was 123 cm.
 Since we had access to a woodwork shop when we were building these solar heaters it was easy for us to saw out
the frame within which the polycarbonate sheet and plywood was lowered. Another alternative is to add strips of
wood to the inside of the frame.
Since we had access to a woodwork shop when we were building these solar heaters it was easy for us to saw out
the frame within which the polycarbonate sheet and plywood was lowered. Another alternative is to add strips of
wood to the inside of the frame.
The frame for the solar heater to the right is made from impregnated wood measuring 45x120 mm, but thanks to
the plywood board on the back, the solar heaters were as stable with a thickness of just 28 mm for the wood
used in the frame.
|
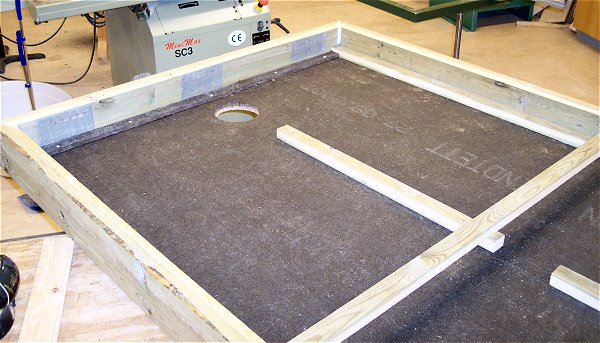
After this all you need to do is to insulate the solar heater on the inside and we chose 12 mm asfaboard
(tar-based roofing felt). However, we have since found that using roofing felt should be avoided as it spreads
a smell of tar inside the house as the temperature in the solar heater rises.
The more insulation you use the better your solar heater will work and it may therefore be worth your while to
insulate the insides of the frame too. Through the big hole heat is conducted in to the house via a spiral tube.
The opening on the underneath of the solar heater, where air comes in, was covered with a mosquito net. After
that it was time to screw on the strips of wood as a distance for the black corrugated sheet metal which is
going to go in the box. In the picture you can also see the strip of wood going crosswise and thus stabilising
the polycarbonate sheet.
This particular solar air heater conducts the heat into the house from the lower edge of the solar heater. The
idea is that the air should be heated on the front of the corrugated sheet metal and then sucked down on the
back of it.
|
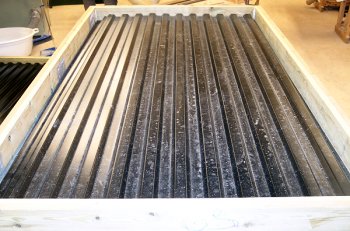 The corrugated sheet metal has a width of 108 cm and that proved to be just right for our solar heaters, so all
we needed to do was to buy sheets of the required length. It doesnt matter whether you place your solar heater
standing up or lying down. If you place it lying down one sheet will be enough lengthwise and standing up you
use two shorter sheets going across instead. When the sheets of metal overlap you estimate a width of about one
metre per sheet. Regardless if you use a standing up or lying down solar panel there will be a gap between the
sheet of metal and the frame, both on the upper and lower edges and thats as it should be. The distance of
this gap isnt critically important, so there was no reason for us to cut the sheets of metal lengthwise in
order to obtain a more accurate measurement.
The corrugated sheet metal has a width of 108 cm and that proved to be just right for our solar heaters, so all
we needed to do was to buy sheets of the required length. It doesnt matter whether you place your solar heater
standing up or lying down. If you place it lying down one sheet will be enough lengthwise and standing up you
use two shorter sheets going across instead. When the sheets of metal overlap you estimate a width of about one
metre per sheet. Regardless if you use a standing up or lying down solar panel there will be a gap between the
sheet of metal and the frame, both on the upper and lower edges and thats as it should be. The distance of
this gap isnt critically important, so there was no reason for us to cut the sheets of metal lengthwise in
order to obtain a more accurate measurement.
These solar heaters will provide an efficiency of about 40-50% but if you wish to go higher than that you will
need to go to the store and spend your hard-earned cash! The solar catchers you find in stores for around 7-8000
kr dont give off any more heat, they are just slightly smaller. If you require more heat than the 1-1,5 kW
(around 1500 kWh from March to August) which these solar heaters will provide, you can always build two and
still have plenty of money left to go bowling with your pals.
|
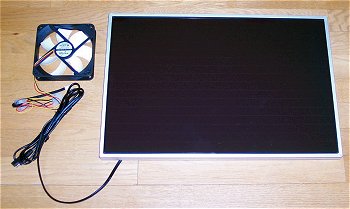 Once you have built your solar air heater youll probably want it to work as well and for that you need a fan.
The fans we have chosen to use are computer fans (12 volt) with outer measurements of 120x120 mm. If you sand
down the edges of your fan it is possible to squeeze it into the spiral tube and it will fit so snugly that you
wont need to fasten it with screws or anything.
Once you have built your solar air heater youll probably want it to work as well and for that you need a fan.
The fans we have chosen to use are computer fans (12 volt) with outer measurements of 120x120 mm. If you sand
down the edges of your fan it is possible to squeeze it into the spiral tube and it will fit so snugly that you
wont need to fasten it with screws or anything.
The fan is provided with electricity from a 12-volt, 6 watt solar panel. This solar panel is made from amorphous
silicon and is available for 494 kr including V.A.T at sagitta.se.
sagitta.se.
|
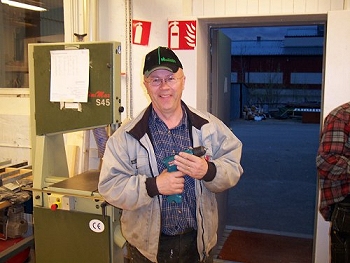
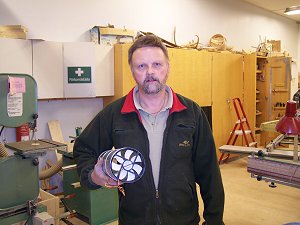 However, the best is yet to come, and Im not referring to Tommy in this picture, but his thermostat and the
really satisfying results he achieved by warming it in his hand. What he did was this: he unscrewed the
thermostat from an old disused washing machine and it turned out to be perfect for the solar heater. Also, the
knob has a graduated temperature scale so all he needed to do was to set it to the desired temperature.
However, the best is yet to come, and Im not referring to Tommy in this picture, but his thermostat and the
really satisfying results he achieved by warming it in his hand. What he did was this: he unscrewed the
thermostat from an old disused washing machine and it turned out to be perfect for the solar heater. Also, the
knob has a graduated temperature scale so all he needed to do was to set it to the desired temperature.
The fact that Tommy had the potency to squeeze the fan into the spiral tube isnt quite as large a feat as
maintained by his facial expression; others too have succeeded to do it. Accordingly, the female participants
werent very impressed by this but instead they came up with ideas about how to keep flies away from the
polycarbonate sheets. If you use tape over the gaps on the sides of the sheets the flies wont be able to crawl
in to the cells and lay their eggs there. I mean, just imagine a solar heater full of hatching flies in the
first spring sun!
|
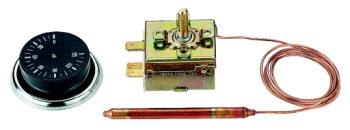 If you dont wish to rummage around the scrap heap looking for old washing machines a similar thermostat is
available from conrad.se
for only 139 kr. The thermostat works on both extra low voltage (ELV) and 230 volt alternating current (AC).
If you dont wish to rummage around the scrap heap looking for old washing machines a similar thermostat is
available from conrad.se
for only 139 kr. The thermostat works on both extra low voltage (ELV) and 230 volt alternating current (AC).
Always using a 12-volt fan (even if you have access to 230 volts in your house) with a battery eliminator may
be a good idea because you wont need to call in an electrician to install the fan.
|
 As one of us tightened a screw another one put the kettle on for some coffee, but now its over and its been
really great. Whether there are enough people interested in continuing the class, I dont know, but I do know
one thing, that building solar heaters is a lot like bowling: all you need is the right touch.
As one of us tightened a screw another one put the kettle on for some coffee, but now its over and its been
really great. Whether there are enough people interested in continuing the class, I dont know, but I do know
one thing, that building solar heaters is a lot like bowling: all you need is the right touch.
A detailed building instruction can be found here.
här.
More pictures available here.
...and here -->
...and here -->
Solar air heaters may also be constructed in a different way, see tompas Solar Air Heater.
|
|
|
|

 Svenska
 English